
You can definitely buy labneh at most markets these days, usually at a premium. Why would you what to do that when you can make it at home? Homemade always tastes better too. I started making my own homemade labneh last summer during lockdown. When I could not find it at the market, I did a bit of research which resulted in finding out how easy it was. WhyI hadn’t done it before.

I like labneh that is very thick with no liquid, as it holds up great for dips as well as cheese balls! I find the store bought brands to be a bit on the looser side, which is great for a dip but not much more. You could use plain yogurt for that, and save a bit of money. We use labneh often not only appetizers but to serve alongside savory dishes. Middle Eastern food is a huge favorite of ours. This recipe for homemade labneh is really foolproof. There is not a right or wrong way, though some techniques and yogurts work better than others. That is what I am going to share with you, what works for us, easily.
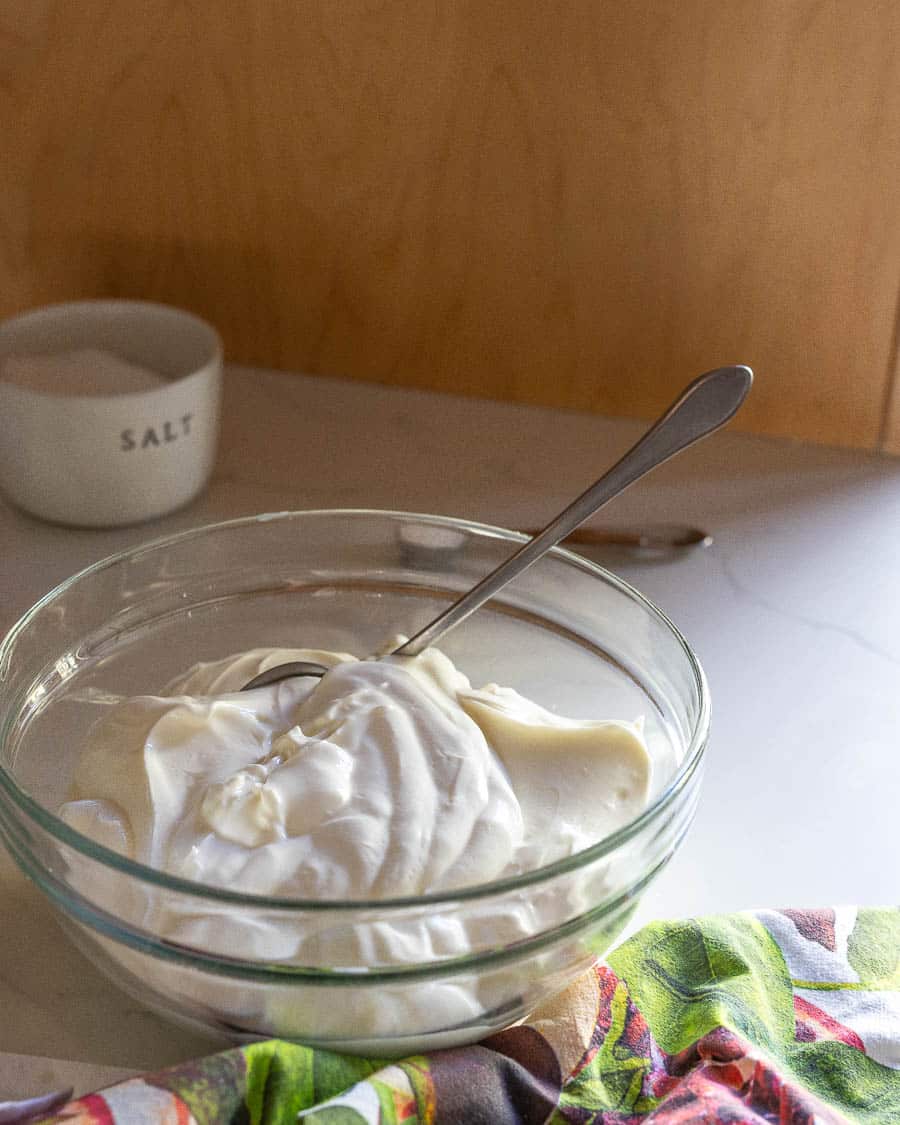
Let’s talk about yogurt first. I tried making it the first time with plain whole milk yogurt, and it did not work at all. It was very loose in texture and did not come together. I then switched to whole milk Greek yogurt, this was the winner. Make a mental note, that low-fat yogurts do not work well either, you need the fat. Go big or go home! Four cups of yogurt creates about 2 1/3 cups of labneh.
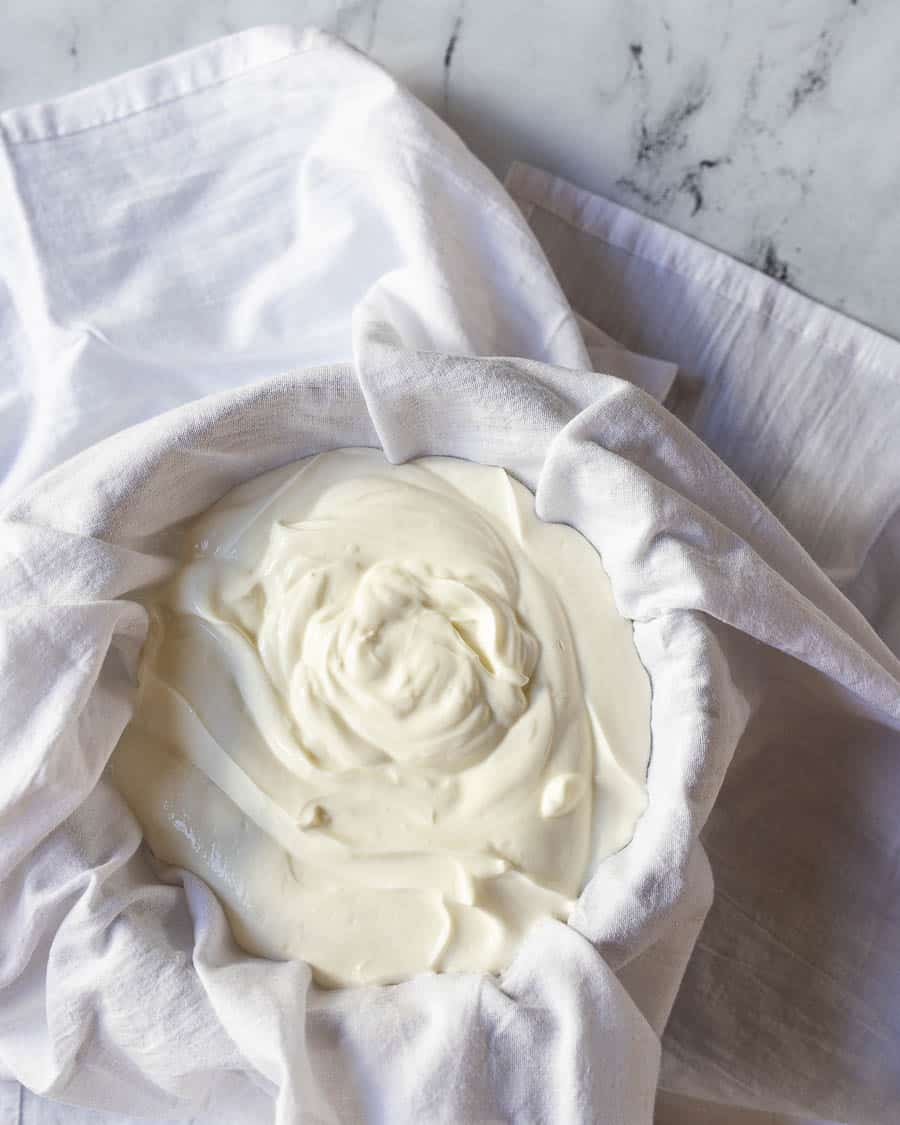
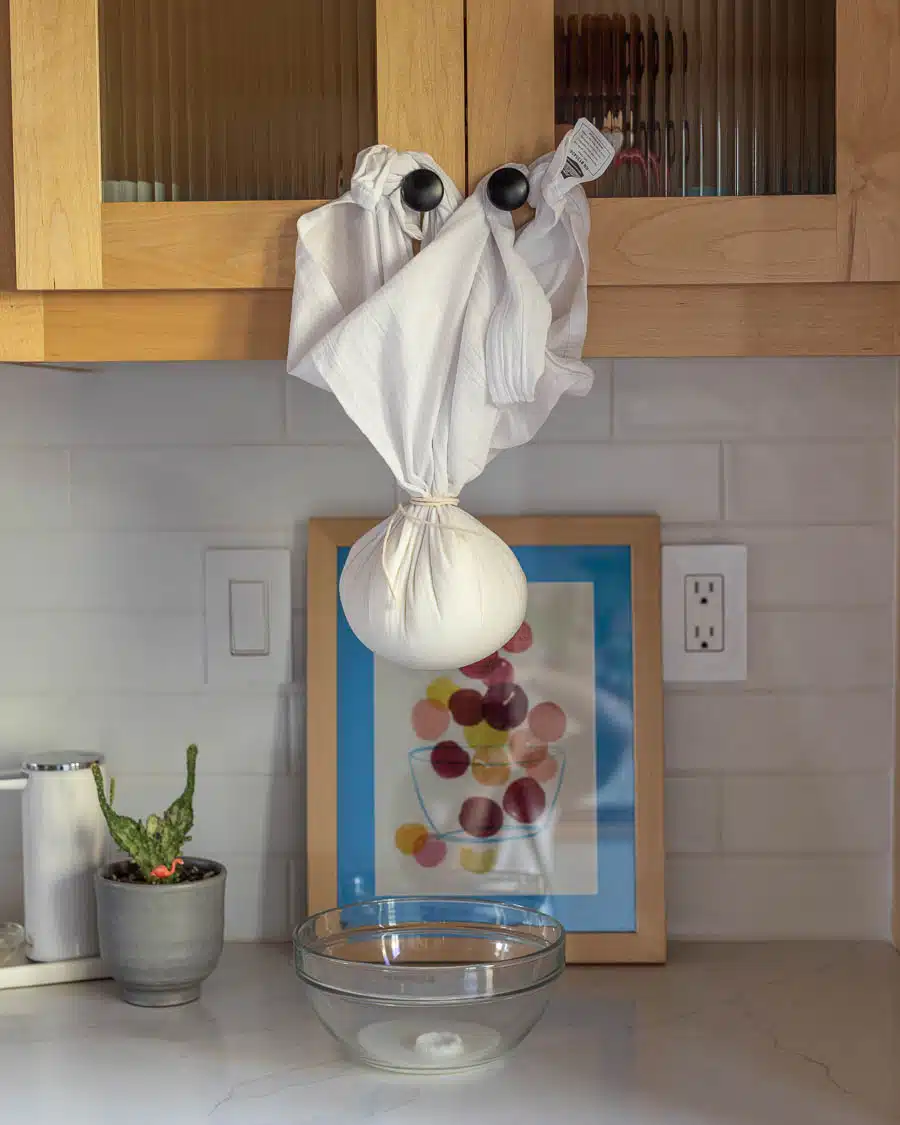
Cheese Cloth was a huge fail as well. Yogurt squished out the little holes no matter how many layers I used. It was a mess. I always have clean flour sacks on hand for baking, and this saved me. It works perfectly by keeping the yogurt together, while allowing enough moisture to release.

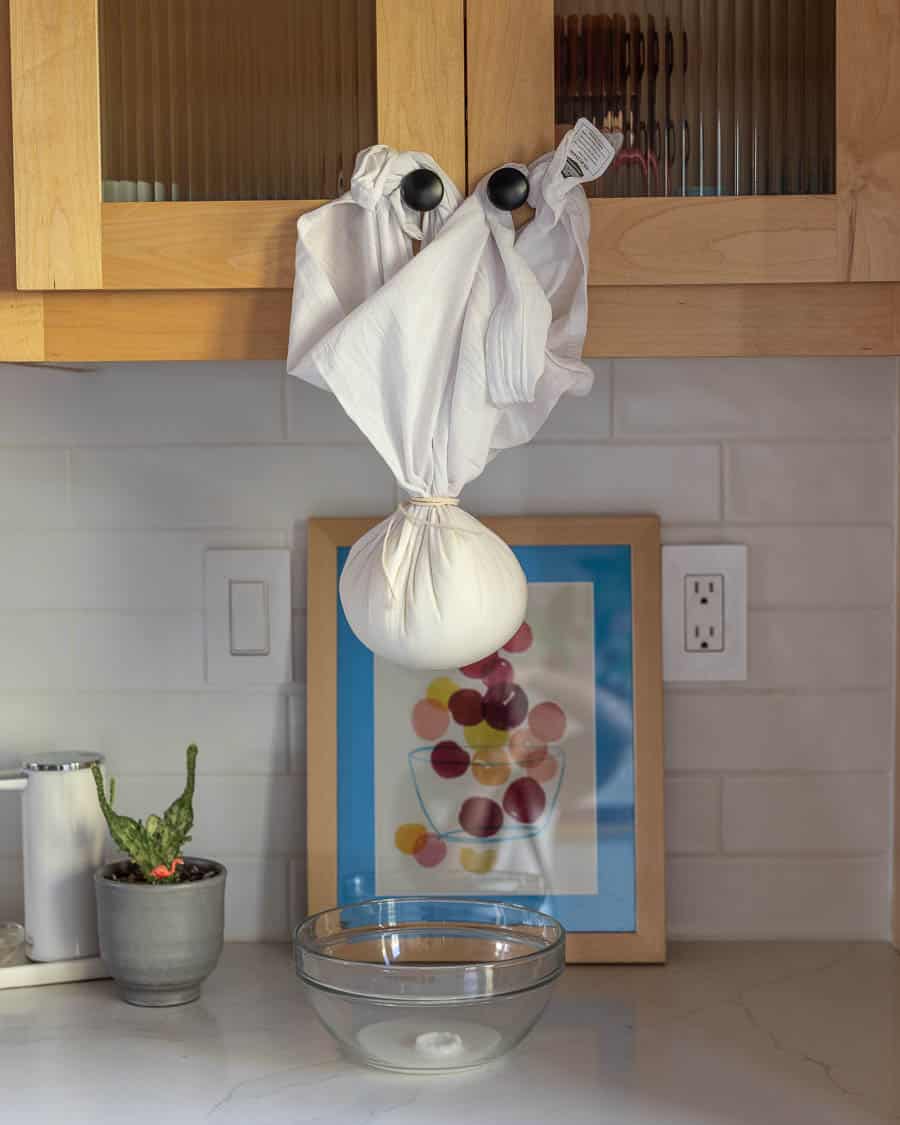
I let the yogurt and salt mixture strain for 24 hours. I start the process by hanging the mixture at room temperature for four hours. I find that this step really releases a lot of moisture, sometimes more than a cup. Then I move it to the refrigerator, placing the flour sack wrapped yogurt into a strainer which is placed over a bowl, to continue releasing moisture until the 24 hours is up.
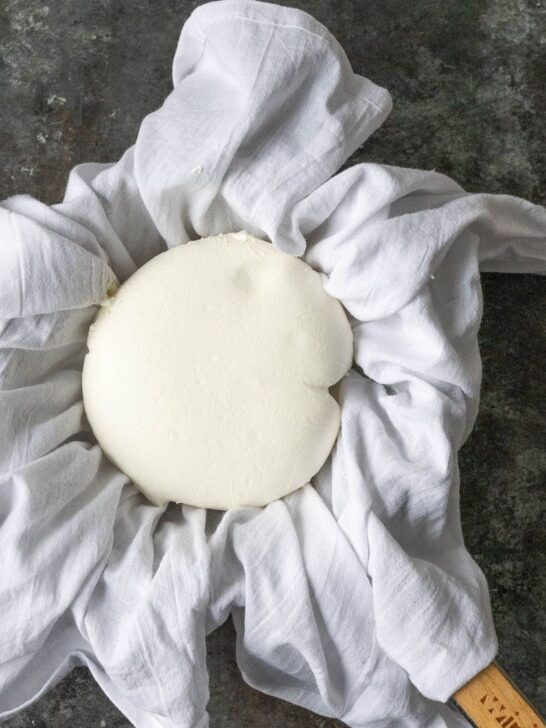
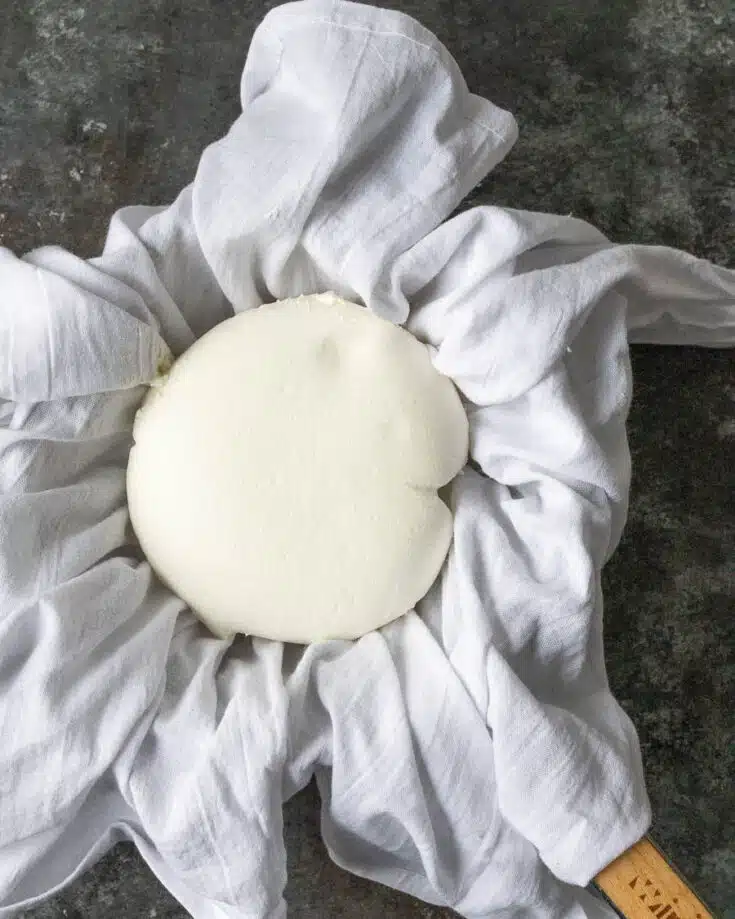
Once the 24 hours has passed, I unwrap the homemade labneh, and place it into sterile glass jars that have air tight seals. It lasts for about 7 days, and can be used as a cheese with Middle Eastern recipes, or used in dips or even made into a cheeseball .
Homemade Labneh

Labneh is a Middle Eastern cheese that is made from strained yogurt. It's thick, creamy, and rich in flavor. Great on it's own or used alongside savory dishes or as an appetizer.
Ingredients
- 4 cups whole milk greek style yogurt
- 1 teaspoon kosher salt
- 1 large clean flour sack
- large piece of kitchen twine
Instructions
Mix the yogurt with the salt, then scoop into the clean flour sack. I find the easiest way is to lay the flour sack into a colander and then scoop the yogurt into it.
Gather the flour sack around the yogurt to form a "package" and secure it with a piece of kitchen twine, as close to the yogurt as possible.
Hang from somewhere in your kitchen over a bowl to catch the liquid. Let strain at room temperature for 4 hours.
Pour out the liquid and place a small colander over the bowl and place the flour sack into it, and move to the refriderator. Continue releasing the liquid overnight for up to 24 hours.
Remove from the refrigerator and use in a recipe of place into a clean sterile glass jar and place into the refrigerator.
Notes
Be sure to use a flour sack that has not been washed with fragnant laundry soap or fabric softener.