
That one rainy weekend we had back in January we decided it was a good time to stay in and make ramen. We wanted a big bubbly pot of broth to cook away all day, and we wanted fresh ramen noodles. Now the problem was we couldn’t find fresh ramen noodles anywhere. We did the only thing possible, and that was to make homemade ramen noodles in our own kitchen.
When we first started blogging we came across a video of a new to the blogging scene of a girl making Chinese pulled noodles; she made it look so easy. We invited a few friends over for dinner and began the adventure of making “simple” pulled noodles. HA! All we can is that it was a good thing we had a few packages of udon in the pantry as it was a colossal mistake to think it was really as easy as she made it seem.
We are kind of addicted to ramen and have been seeking it out whenever possible. In Oakland, we have a favorite spot, The Ramen Shop, which serves a filling bowl of noodles and hipster cocktails. In San Francisco we are big Ken Ken fans; the location is killer, the menu is small and the food never disappoints. I have a feeling if we still lived in the neighborhood we would eat there all the time. We have a trip planned to New York in a couple weeks and our list of eats if filled with ramen joints, coffee shops, and donut shops. Weird combination.
Do not be intimated as this recipe is insanely easy. Inspired by an article in Food and Wine magazine about Ivan Orkin of the famed Ivan Ramen in New York (which we cannot wait to eat at), and our trusty KitchenAid mixer making homemade ramen noodles at home is a breeze. And it is so much fun! I mean really fun, and the reward is a delicious bowl of fresh homemade ramen noodles.


The first time I made the recipe I did not pay attention to the ingredients 100%, nor the instructions, and went by the seat of my pants. It worked. Then I did it a few more times, again, following the same formula that I used the first time, and each time was perfect.
Tips that you want to make sure you follow:
- You need to use the baking soda. In Japan they use kansui which gives the noodles a springy touch, this is what the baking soda will do.
- Toast the rye flour. I really like it toasted well, but not burnt, as it gives the noodles a nice flavor and aroma.
- I did not have cake flour one time so I made a version of my own and it worked perfectly. This is the formula for cake flour: 1 cup AP Flour – 2 tablespoons of AP Flour + 2 tablespoons of cornstarch = cake flour.
- The dough will seem a little scrappy; do not add more water to it or you will have soggy noodles. The dough comes together after a little kneading and upon rolling out the sheets of pasta.
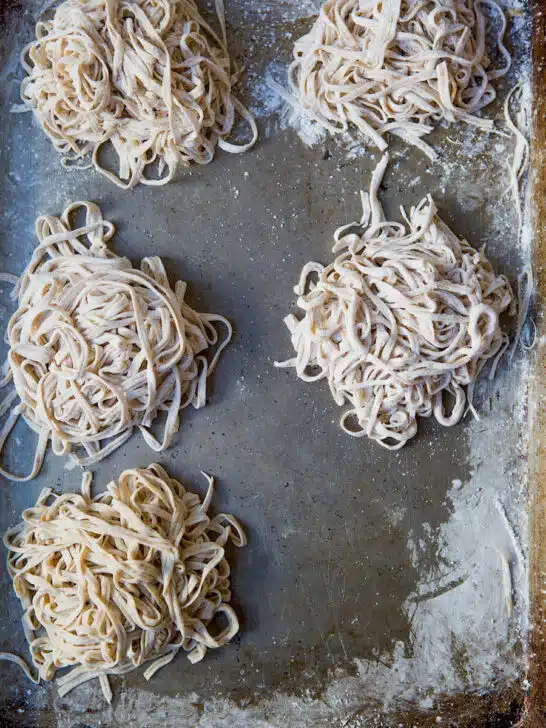
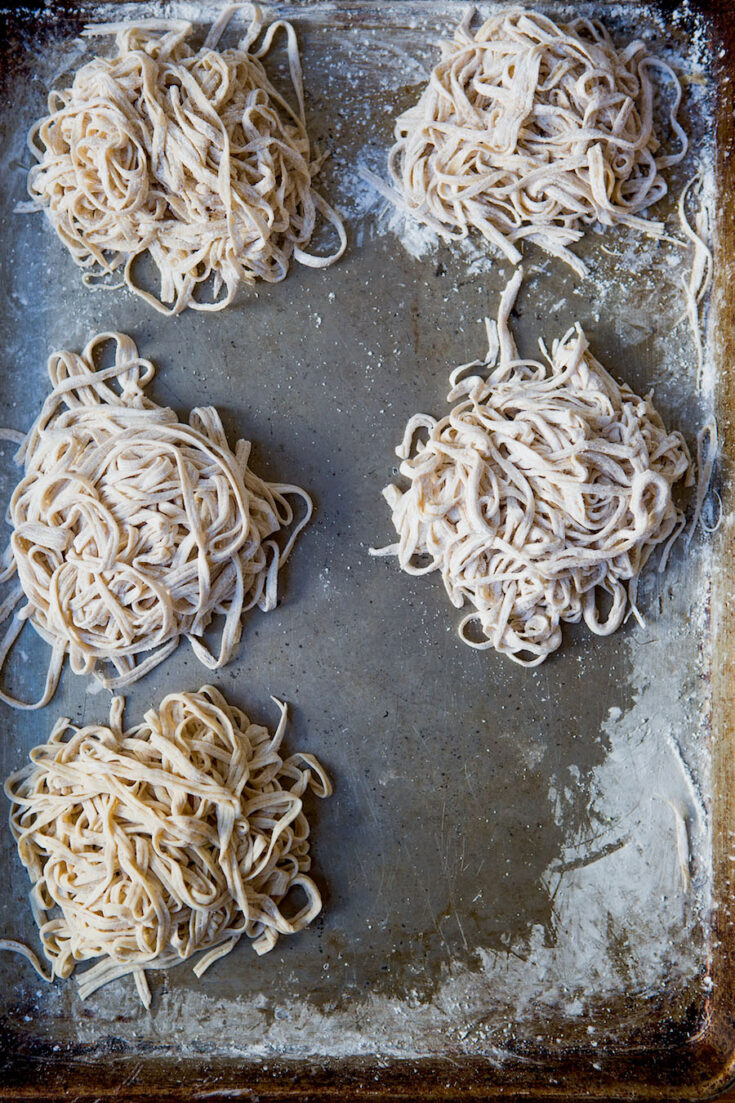
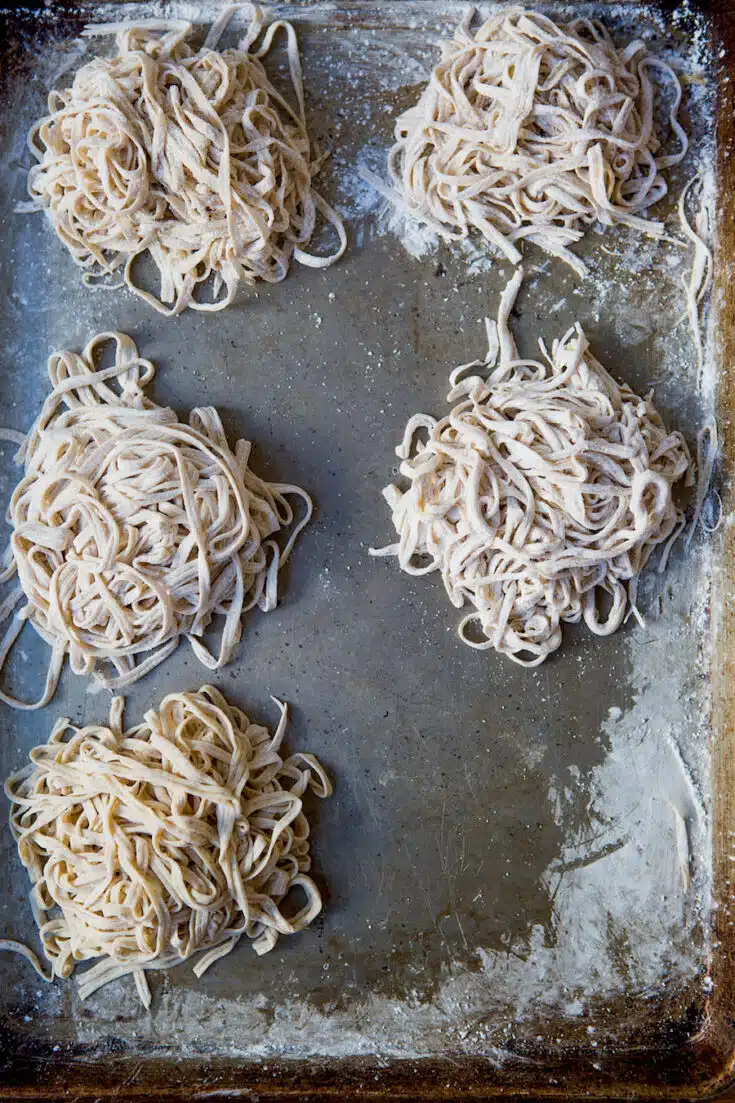
- I divide the noodles into 5-ounce piles (it will make 8 servings) and whatever I do not use then I place into small freezer-proof bags to use at another time.
- After draining the noodles, immediately rinse with very cold water, using your fingers to gently separate. Then drizzle with a little sesame or neutral oil (such as canola), while the noodles are in the strainer. This helps keep them separated.
- To make it easier (and more fun) use your KitchenAid with dough-hook and their pasta attachments.
After playing around with the recipe a few times, and enjoying many bowls of ramen, we decided to make this video to show you how we did it, and how easy it really is when you use your KitchenAid and their pasta attachments. Hopefully, it will show you just how simple it really is, so that you can tackle having fresh ramen at home. Time and patience are the extra ingredients you need for this recipe. We know you have them or you wouldn’t be here!
Have fun!
Homemade Ramen Noodles
Not going to lie, it does take time and patience to make homemade ramen noodles. The result is so worth the effort. Super delicious! We included a how-to make video using a kitchenaid pasta attachment.
Ingredients
- 1 tablespoon plus 1 teaspoon baking soda
- 1/3 cup plus 3 tablespoons rye flour
- 4 cups all-purpose flour
- 2 cups cake flour
- 1 tablespoon sea salt
- 2 cups cold water
- cornstarch
Instructions
Preheat the oven to 275.
Scatter the baking soda onto a piece of parchment paper, and lay onto a baking sheet. Bake for 1 hour. Let cool.
In a small nonstick skillet, toast the rye flour over medium-low heat, stirring, until golden brown and fragrant. This takes 4 - 5 minutes. Do not let the flour burn.
In a small bowl combine the water, baking soda, and the salt. Stir, then let sit until dissolved.
Place the rye flour into the bowl of your KitchenAid standing mixer, fitted with the dough hook. Add the remaining flours, then mix for 30 seconds on the lowest speed.
With the mixer at the lowest speed, slowly start adding the water mixture into the flour.
Continue mixing until the dough comes together.
Turn the speed to medium, knead the dough until it forms a shaggy ball, this will take 7 - 10 minutes.
Cover the bowl with plastic wrap and let sit for 30 minutes at room temperature.
Gently knead the dough for 3 minutes and form into a disk.
Cover the dough with a damp flour sack towel.
Tear off a small piece of dough about the size of a lime, and lightly flatten.
Roll the dough through your pasta machine at the widest setting.
Fold the dough in thirds, and roll it again at the widest setting.
Repeat this process 5 times. The dough will feel smooth and elastic.
Roll the dough through all of the settings on the pasta machine - starting on widest and ending with the narrowest. Do this 2 times at each setting.
Lightly dust 2 baking sheets with cornstarch.
Attach the spaghetti cutter onto the mixer, then run the sheet of pasta through the cutter.
Gently toss the noodles with the cornstarch to separate them. Then set aside on the other baking sheet.
Repeat the process until all the dough has been cut. You will end up with 8 even portions (5 ounces each).
Let sit until ready to cook.
Or see below.
bring a large pot of water to a boil and cook just for 1 minute - the noodles will be al dente. Do not cook longer or you will have mush.
As well I do not like to add them directly to the broth as it can make the broth a little thick. Always precook.
Immediately drain them in a colander. I like to gently toss in running cold water for 30 seconds to stop the cooking process. Then lightly drizzle a very small amount of sesame seed or canola oil over the noodles to help prevent any sticking. Then add to your favorite broth.
If you do not use all of the noodles at one time, you can freeze them in individual resealable plastic bags for up to 2 weeks.
They will keep in the refrigerator overnight.
Notes
Make our amazing Pork ramen to serve these noodles with.
jpf55
Thursday 23rd of July 2020
Hello, I know I am five years late to this party but thanks for this great post! Would it be ok to switch the rye flour for whole wheat and if so, would you use the same quantity? Thanks in advance
Denise Woodward
Saturday 1st of August 2020
Hello! I am not sure about whole wheat flour but I would give it a try and see what happens! Let me know.
~ Denise
Tina
Thursday 4th of February 2016
Thank you. I don't watch videos, rural internet sucks! After reading the instructions to not over cook or they become mushy I wondered about tossing them right back into a broth. So, you don't actually boil them in the broth/soup, just ladle the hot broth over the pre cooked noodles and let the broth warm the noodles back up. It looks like you could just let the fresh cut noodles air dry for longer storage (if you don't need a full batch right then.) then boil them a little longer than you would fresh noodles. I will try both ways plus add some powdered vegetable powder to the dough for different flavors (endless possibilities: )
Tina
Wednesday 3rd of February 2016
I definitely plan to try your ramen noodle recipe! I have a question though...after drizzling with oil...what next? Freeze, let air dry, immediately add to broth...? The recipe just seems to stop bluntly with no final step.
admin
Wednesday 3rd of February 2016
HI Tina,
The recipe has instructions for cooking the noodles; the video was basically to know how to make them. You can freeze the noodles if you want for up to 2 weeks. Or you can lightly cook and then add to your favorite ramen broth. Enjoy!
Paula - bell'alimento
Sunday 15th of March 2015
You've got me wanting to break out the pasta maker today. Just loverly. Pinned & stumbled xo
admin
Thursday 19th of March 2015
Once I get started on using it, I never want to put it away. Already thinking of some new ideas. Hope you try the ramen!
Mardi (eat. live. travel. write.)
Friday 13th of March 2015
What a fantabulous video Denise! You make it look so easy. I need those attachments for my mixer now!
admin
Thursday 19th of March 2015
Thanks Mardi! It really is fun to do, and the noodles are a delicious reward. So good!