

The August 2009 Daring Bakers’ challenge was hosted by Angela of A Spoonful of Sugar and Lorraine of Not Quite Nigella. They chose the spectacular Dobos Torte based on a recipe from Rick Rodgers’ cookbook Kaffeehaus: Exquisite Desserts from the Classic Caffés of Vienna, Budapest, and Prague.
Chocolate
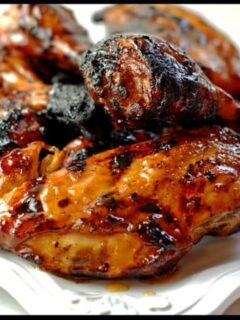

How do you make your children eat chicken? By making this fool proof kid friendly chicken recipe, it will have your children begging you for more. Your kids will love this!!! Simply bbq’d chicken is basted with a sweet but tart glaze until it is golden brown.


This weeks challenge was brought to us by Lyb of And then I do the dishes and she picked the cake that Dorie got fired over: the Chocolate Armagnac Cake.


Clara over at I Heart Food for Thought was our gracious host for this week’s Tuesday With Dorie (TWD) challenge and she picked Chocolate Chocolate Cupcakes! I love chocolate, so I knew this would be a fun challenge for me. We had a birthday brunch celebration to go to and I knew this would …


Tiramisu, Dessert, Sweets, Italian, Pick Me Up Dessert, Cooking, Food Blog, Food Blog Event, Culinary, Recipes, Food and Wine, Food and Drink

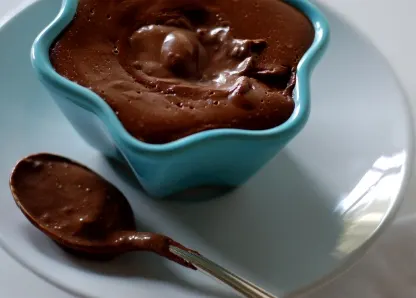
This week’s TWD challenge, spelled comfort! Melissa, over at Melissa’s Kitchen picked Chocolate pudding. As soon as I saw what our challenge was, it brought up memories of childhood. Mind you back in those days, it was Jello brand pudding around our house. Not the dreamy creamy kind such as this recipe. I use to …