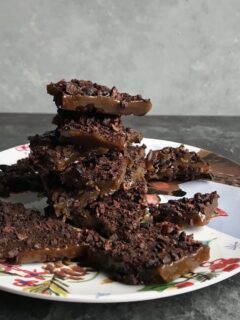
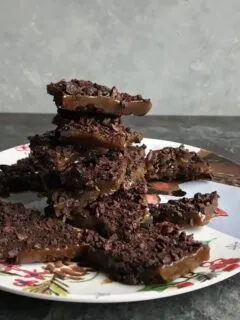
I cannot imagine the Christmas holidays without making my Grandma Woodward’s Homemade Toffee. Unfortunately for the past few months, nuts and I do not agree. I did make a few batches to give out to clients and then I decided it was time for me to be able to enjoy my favorite holiday treat. I …
Dessert

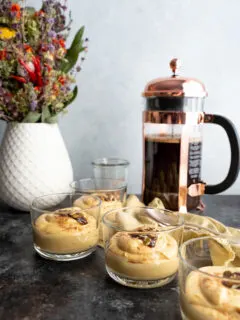
I love anything pumpkin. The past two months I have been going a bit crazy with using it in everything from breakfast oatmeal to stirring it into a big bowl of mac and cheese. This recipe for Creamy No Cook Pumpkin Mousse came about one evening when I needed something to feed my sweet tooth. With …

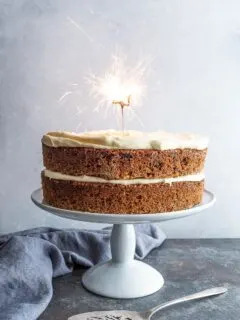
This recipe for Super Moist Carrot Cake is by far Lenny’s favorite sweet recipe that I bake. I make it every year to celebrate him on his birthday. Whenever he has a slice of carrot cake somewhere else, he always says that mine recipe is the best recipe out there. Now I am sharing that …

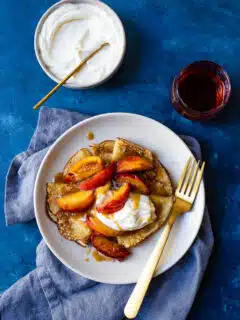
Can we talk about this recipe for Crepes Dentelles with Sautéed Peaches and Caramel? It is so good that it leaves me speechless. It has been a long time since I have enjoyed a dessert that makes my heart swoon. It is silky, buttery, and ever so dreamy. It has quickly become my go-to dessert …

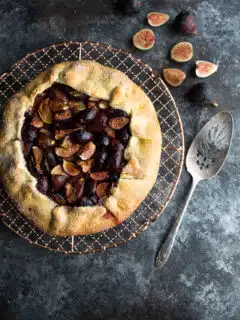
I am a fan of figs. How about you? As soon as they show their squishy little faces at the market, I am bringing them home by the pound full. Typically I snack on them but the past couple weeks I have been enjoying on savory sandwiches as well as a few too many Fig …

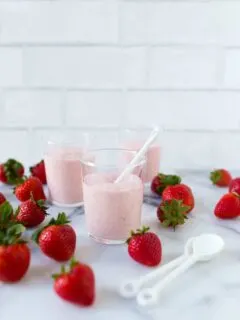
I have been using all the strawberries by making this super easy dessert every week for the past two months. That is the honest truth. It is utter perfection, sings Spring when touching your lips, not to mention it is so creamy and dreamy with every bite. Can you tell how much I am in …